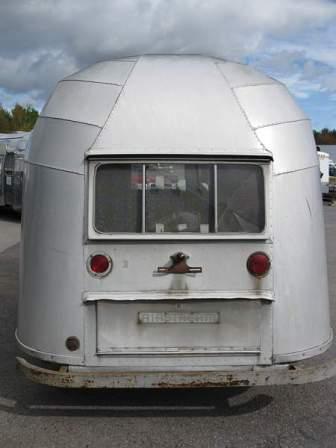
Airstream Restoration of Scott and Kathy's 1955 Flying Cloud Whale Tail - Our California Vintage Airstream.
Showing posts with label Cleco. Show all posts

Sunday, March 9, 2014

Longing for More Awning Memories

There is something special about sitting outside under an Airstream awning.

Maybe it is the friends that stop by to visit, sitting back in our comfy folding chairs and making plans for the day.  In the morning, I know I can sit outside under my awning enjoying gentle sunrises and the smell of bacon cooking over a camp stove.  Or during the mid-day heat, we can sit and breathe - and not be rushing around in the frenzy that is normal daily life.  Maybe the special feeling comes from a cooling breeze.  And at the darkest part of our evenings, I love to hear the guffaws and tinkling laughs of some of my favorite people.


And I am thinking about all these times now.

Our now-polished awning rail for our vintage Airstream awning rail is re- installed.
The aluminum was buffed after the awning rail was removed.


Cleco fasteners hold the polished awning rail in place.


Friday, March 7, 2014

Windows - We've Got Windows! - Part 4 - Little Eyebrows the Drip Edges

When listening to Colin and Tim talk, I heard that lots of rivets are used.
I read about lots and lots of rivets in Tim's book on Airstream Restoration called Restoring a Dream.
Now I am understanding.

Rivets on the back-widow.  Rivets on the front window.  Rivets on the Drip Edge.  And that is just a window!!!

Polished to shine.


The aluminum drip edges over the windows are positioned with clecos.  Thanks Reid!

Wednesday, March 5, 2014

Hatch Door - Framed!


The original hatch frame was cleaned, straightened, and polished.


For superior strength, the rear hatch frame was buck riveted.


Our hatch has new gaskets.  Polished to shine, the original hatch drip edge was straightened and fit with clecos to be riveted.

Tuesday, March 4, 2014

Hatch - Door to the Man Cave


Every man needs a spot of his very own.  A man cave of sorts.  In an Airstream that space may be limited to the area accessed by the hatch.  Actually I am kidding, but Scott does use the exterior compartment more often than I do...

Corrosion required a new rear hatch.


Like the curbside window, the rear hatch also required a new hinge.  Colin Hyde to the rescue!  He made a new hinge.  This is the new lower hinge before it is trimmed to fit the hatch door.


Colin's guys made us all new hatch door with a new Alclad aluminum skin.

Sunday, March 2, 2014

Windows - We've Got Windows! - Part 3 - Unobtanium No Longer!

Unobtantinum - No longer! *

First the lower "back-window" is fit into the window opening.


The original vintage Airstream window frames which were restored with new glass, are fitted into the street side.


Curbside, the rebuilt fixed window with the original frame is positioned with cleco fasteners.


* Colin the miracle worker - he found a way to build a new window hinge to replace the missing one!
The street-side original window was not missing but the hinge was destroyed.


The curbside windows cleco'd  and with protective tape is ready for vulkem and then buck riveting.


The curbside window and awning back-window is riveted to our 1955 Flying Cloud.
 
Street-side window and back-window of the awning window is riveted to the exterior aluminum skin.

Friday, February 28, 2014

Windows - We've Got Windows! - Part 2 - Rear and Front

Our plans for how we use our vintage Airstream are to enjoy our time - as we currently do with our 2008 CCD.


We rarely use full hook-ups.  We do enjoy traveling and camping in the hot summer months, so we do look for sites with electricity to get some sleep.  We boondock and enjoy staying at remote locations without electricity where ventilation is key to our comfort.  Like the cutest shoe, if uncomfortable - then it won't get used.

All all these are considerations when buying an Airstream, and I'd highly recommend renting a trailer before buying one, as it helped me to understand the comforts I needed, wanted, and what options are merely a waste of time/space/money.

At the rear of the trailer, the large window provides an emergency exit.  When towing, the rear window also provides a clear line of sight to the road behind the trailer. Currently, this feature is no longer available from Airstream, and is another reason we wanted a vintage trailer.

Set inside the trailer the "back-window" of the jalousie window is cleaned up and has a new screen.


The "back-window" of the rear window is cleaned up with new gasket and new screen. The mullions will be attached after they are powder coated.


The aluminum mullions and frames are polished and new glass is inserted into the rebuilt frame with new gaskets.


Cleco fasteners are inserted hold the front jalousie window (old glass was removed).


The window edges were taped to be ready for Vulkem caulk and buck rivets.


The jalousie window is riveted to the Airstream shell.

Thursday, February 27, 2014

Door-in-a-Door Rebuild - Part 3


Boss!  Da Door!  Da Door!
I don't know why I'm in a mood to think about the old TV show "Fantasy Island", as I never watched it.

Work is done on the Door-in-a-Door!

The inner door rivets were removed to separate the back and frame from the damaged front aluminum.


Prodex insulation is added to each section in the frame.


Using new aluminum, the new outer door is cut and formed.


The two doors are attached together with the hinges.  Then the door hinges are securely attached to the new thick hinge patch also made from aluminum.
LINK to 2/13


Monday, February 24, 2014

Raised Eybrow! - Drip Edge for the Door

Back in the 1955 Airstream trailers had people-like personalities.  The straightend and polished door's eyebrow gutter was installed.

Sunday, February 23, 2014

Windows - We've Got Windows! - Part 1 - Awning Windows


Yipee!!!   The windows are going back into our Flying Cloud!!


1955 vintage Airstream windows were manufactured more than one window type. Many Airstream trailers of the era were manufactured with custom features.  Some features were only offered from either the Ohio or the California factory.  Owners would place an order for a trailer options, and the factory would build a trailer for that owner.  A couple places to see the 1955 Flying Cloud options is vintageairstream.com or to read the 1955 Flying Cloud threads on airforums.com.

Our Airstream's largest windows are fixed windows letting lots of light for the front dinette with only lower awning windows open.  The front window is a jalousie window which has louvers that can be opened for ventilation during a cooling rain.  Smaller windows on the sides of the trailer open fully as does the rear window.

On the fully-opening street-side and the curb-side awning windows, there are two main assemblies.  The exterior-window with glass that moves to allow air into the trailer, and also the "back-window" that is stationary.  Reid installed new glass and gaskets in exterior-window - installed on the back side of the polished frames.


The fixed portion of the awning windows, the "back-windows" are fit into the aluminum shell using cleco fasteners.


The tape was put down in preparation for caulking with vulkem and then buck riveting.


Sunday, February 16, 2014

Rear Street Side Panel Work


It is interesting to watch the progress of the panel replacement.
Rather than remove and replace all the damaged panels at once, Colin Hyde Trailer Restorations is restoring our 1955 Airstream in a methodical and controlled manner.  Each damaged aluminum skin is being removed, duplicated, and new Alclad aluminum is installed - one section of the shell at a time.  Completing one panel at a time controls the shape and insures the original placement is duplicated for the restoration.

I'm glad to have a professional who understands the big picture of what work we requested, what potential additional troubles can be hidden, how systems work together, and scheduling work in a logical method.  Thinking ahead for the integrity, costs, and beauty of our vintage trailer.

The scratched rear corner street side aluminum is removed and replaced and rivet ready.

Saturday, February 15, 2014

Bucking Byam's 1955 Flying Cloud - Rivets!

Bucked rivets are used at the Airstream factory for strength, durability, and structural integrity. Olympic rivets and pop rivets would not be strong enough to withstand the trailer's flex while traveling - listen to TheVap.com Episode 80 for lots more rivet information.

We will be using our vintage Airstream as much as possible, which exactly fits Colin Hyde's commitment to Airstream restoration using the best processes and materials (not every trailer shop has this philosophy). 

Our curb-side lower aluminum is buck riveted.


The shell is buck riveted to the frame through the side of the C-Channel.


Buck rivets securely attach the curbside lower panel.