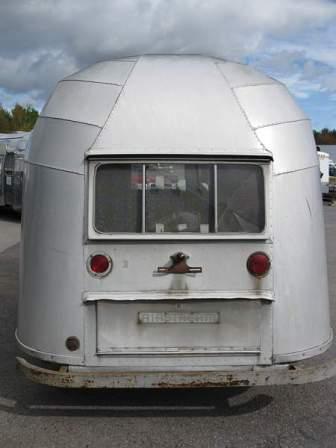
Airstream Restoration of Scott and Kathy's 1955 Flying Cloud Whale Tail - Our California Vintage Airstream.
Showing posts with label Frame. Show all posts

Tuesday, February 18, 2014

Lower Panels Replaced - Last Ones!

Our 1955 Flying Cloud has a front panel that wraps around the entire front of the Airstream. Riveted to the bottom of the end cap, the lower front panel does not lining up with the bottom of the jalousie window and extends down to the banana wrap.  The largish panel does extend from the street-side window to the curb-side windows.  After checking RJ Dial's extensive Vintage Airstream website, it appears that the factories had many front panel versions for the 50's Flying Cloud models.

Our new front lower panel is in place and ready for buck rivets.


The small panel just forward of the door was replaced.


Lots of rivets were used to attach the front panel.
Four rows of rivets will attach the shell to the steel attachment-bracket, rather than the two rows Airstream originally used in 1955.


More current models, including our 2008 Airstream no longer are made with any vertical stabilizing steel attachment-bracket commonly called the hold-down plate.  Current production by Airstream has the aluminum shell is riveted to the C-Channel only.

Sunday, February 2, 2014

Belly Pan - All Curved Corners

A new belly pan is being attached to our vintage Airstream frame!

Our shell-off vintage Airstream restoration at this time looks like 2 completely different projects.
The shell was polished and we need to make a decision about which panel or panels to replace.
And our chassis is getting close to being completely done - so exciting!!

Cuts in the aluminum for the corner construction is very familiar to me.  It looks like fabric clipped to ease a concave curve.


Because we added a space for a spare tire under the frame, the belly pan is installed in a few more panels.  Just so I don't forget - the belly pan aluminum is not the same as used on the sides of Airstreams.  The belly pan is made of 505 032 thick.


The cleco fasteners are holding the rear street-side panel in place before it is riveted.  Cleco is a newer tool for me, so I googled the word to find out it is also spelled cleko.

Saturday, February 1, 2014

Warming Up - Insulating the Belly Pan

Reflectix reflective insulation is cut to fit under the plywood floor between the frame rails including above the water tanks.   It will also be used to insulate under the water tanks.
Note:  The step is painted with a UV resistant topcoat over the black POR 15.
The visible portions of the rails will topcoat painted soon. 

The portions of the frame that are cut out for the plumbing connections - all will be strong!  Each cross member will be strengthened at the bottom with a heavy steel bolt-on bridge.  The bolts will allow access to the plumbing if needed at a later date.


The dump valve is installed & valve handles extended through the main rail into an are that will be accessible through a flip down hatch.


 Gray tanks installed!


Fiberglass Insulation to really keep us warm! 

The end of the cross members have the added anti-chaffing strips.
First piece of the belly pan is cut!!!!  We are moving forward again!

Friday, January 31, 2014

Adding Grey Tanks - First in 58 Years! Part 2

At Colin Hyde Trailer Restorations, Reid has been working on our plumbing - thanks Reid!

The bathroom lavatory sink and shower join to drain down to the first (forward) tandem grey tan.
 First checking the fit of all parts before they are attached/glued together permanently


Adding gray tanks to our vintage Airstream for the first time in 58 years! 
During travel, trailers move and flex.  While it is not legal or safe to ride in a moving trailer, someday I'd like to get a video set up to see the movement that happens.  The movement can break areas that are too stiff.  To be sure that our tandem tanks maintain a secure and dry connection, a flexible link is added between grey the two tanks.  Thick rigid foam insulation is added to further protect the link and will keep the tanks from shifting forward and backward within the frame.  A similar link will be added to the tandem fresh water tanks.


From the back of the rear grey tank, the used water will exit the trailer through the combination black and gray water valve.  Unlike modern trailers, the dump valve will not hang below the belly pan.  I just realized I have very few photos showing our dump valve - just not photogenic!   Because in 1955 we had no dump valve, our Flying Cloud valve handle will not show on the exterior of the trailer. The valve handle will be accessible through a hatch in the belly pan.  This decision will also keep our restoration with the beautiful clean design of 1955.


Both the fresh & grey water tanks with plumbing connections.
  
The portions of the frame that are cut out for the plumbing connections - all will be strong!  Each cross member will be strengthened at the bottom with a heavy steel bolt-on bridge.  The bolts will allow access to the plumbing if needed at a later date.


The shower pan's drain trap will fit inside the frame, hidden by the belly pan.


Thursday, January 30, 2014

Double Draining - Planning the Bathroom Drains

We don't use a lot of water in our 2008 Airstream, we can go without a fresh water fill up for at least 5 days.  And I expect that our water use will remain the same for our 1955 vintage Airstream.
We do need a larger water tank than the missing original fresh tank that fit under the cabinet under the front window.

We are taking advantage of Vintage Trailer Supply's standardized water tanks, positioning the two tanks below the floor in between the frame rails.  Plumbing the fresh tanks in tandem will work really well for us.  The tandem gray tanks will hold the same amount of water, reducing the possibility of overflow which I really want to avoid!

Putting the tanks into their spots in the frame rails.


Close-up of the tank straps covered with a peel-and-stick waterproof membrane.


The street-side plumbing is for the bathroom lavatory sink and the shower drains.  They join together to drain into the new grey tanks.  Back in 1955 Airstream and other trailers did not have holding tanks for water coming from the sinks and shower, and water was just dumped on the ground.  Not very sanitary, and so I'm glad to upgrade our Flying Cloud.


 Cutting the cross members for the tandem tank fittings.


The cross members ready for the tank connector. Note: the step was painted with the gray topcoat over the POR15 rustproof paint.

Tuesday, January 28, 2014

Floor Attached to Frame!

Construction!
No longer pulling things apart!
All the preparation work is complete, things are going back together again, and I could not be any happier!!

The old leaf spring axle is gone, white the new smoother riding torsion axle is positioned and the bracket is attached to the frame.


Glue is used to attach the plywood floor is to the frame.


Elevator bolts are used by the Airstream factory to attach the C-Channel to the outriggers only - so they are spaced widely apart, approximately every 2 feet.  Then the factory used (uses) self taping screws are used to attach the C-Channel to the plywood between the outriggers.  
Our 1955 Flying Cloud has Colin's added strength by using elevator bolts inside the C-channel - all along the C-Channel to more securely attach the frame to the floor and therefore lessen stress to the trailer.  The elevator bolts are attached to the outriggers and to the plywood floor.  Colin used self-taping screws to further secure the plywood floor to the outriggers and the cross members.
Improved again!  Even the curves are attached with elevator bolts - every 8" to 10".


Using the rotisserie, our Airstream is moved to comfortable positions for securely bolting the floor and chassis together. Shown with the hold-down plate welded to the front of the frame.  The extra elevator bolts are best seen in the photo from the under-side of the plywood floor.


Monday, January 27, 2014

Belly Pan Improvements - Vintage and Better!

As I'm not an expert, I really never thought much about the underside of our trailer.  I did know that Airstream trailers have aluminum belly pans which cover the frame, and the bottom of the plywood floors.  This keeps all the ugly, wet, muddy, floor-rotting frame-rusting, road debris from ruining the trailers from the foundation up. It is one of many reasons why Airstreams survive and are enjoyed for decades!

One of our improvements are in the area of the spare tire.  The tire will fit inside the trailer frame, recessed like the newer model Airstreams.  Our vintage Airstream will have this area lined in aluminum, keeping the plywood floor dry.  To protect the floor under the frame surrounding the spare tire, the frame is wrapped in more aluminum.


Originally the floor area under our steps appears to have be painted.  For our restoration, another belly pan improvement is a new aluminum lining to protect the area above the Swing-Away Step.  Colin Hyde fabricated this for us - thank you!  This will protect the floor from wood rot found when we first saw our 1955 Flying Cloud.

Saturday, January 25, 2014

Strapping Tanks

Below the floor, will be two gray water tanks, and also 2 fresh water tanks.  These are standard 16 gallon tanks, now available at Vintage Trailer Supply - saves lots of money!  The metal straps, fabricated by Colin Hyde,  will keep the tanks secured in between the main rails.


UPDATE 2/6/2014 -  Colin Hyde's reply to Gary's question.

I have a 55 Flying Cloud also. I'm in the process of installing the water tanks now. Why do the straps have a loop in them? They don't have a "loop" in them. They are formed like a "C" with short legs on either end. This allows us to install the bolts longitudinally instead of vertically, causing protrusions in the bellypan. It also allows us to put tension on the straps.  How are they secured on the topside (is it just pressure against the bottom of the floor)? The tanks are up against the underside of the floor & foam blocks minimize lateral movement. 
Coli

Friday, January 24, 2014

Missed a Post - Sharing Now - More Frame Strength

When I wrote about our now-sturdy steps being installed on our Byam's 55 Flying Cloud - I missed some very important work also done at the same time.  Today I found my omission, and wanted to share.

We pull our 2008 Airstream with a Jeep Grand Cherokee including in the mountains of Colorado.  We are asked about our experiences and they have all been good with the Jeep's tow package and its V8 Hemi 5.7 liter.  Driving without our Airstream, the 4 cylinder "Eco" mode saves us gas too!

Anyway, the Jeep has some room in the back for Byam's kennel, and a lot of other stuff, but not enough room for a spare Airstream tire.  Also packing and moving around a gritty spare tire is not my idea of fun.  So we decided that we need a spot for the spare tire to always be with the trailer.   

Our frame was improved, adding another pair of bracing to provide support for the spare tire under the Airstream.  The bracing also adds more strength to the A-Frame.


The additional bracing is painted.  Below the frame is upside down and the trailer's front hold-down plate is facing the floor.


Shown with the sheet of aluminum that will be the attached to the frame as part of the belly pan and the aluminum bent to wrap around the frame also.

Monday, January 21, 2013

All is Well!


The bottom flange of the wheel well was rusted and needed replacement.
The balance of the wheel well is in good shape. 
We are fortunate to have a vintage Airstream with metal wheel wells.  Changed sometime in the 1970's, some later model trailers have wheel wells instead made with a thermoform plastic.  Some of the thermoform plastic wheel wells have over time cracked or degraded.
New galvanized steel was used to form the flange.
Positioned on the trailer for size.
Clamped and attached. 
Our new wheel wells are positioned on the frame, ready to be sealed with Vulkem, caulk, and then painted.  The hold-down plate is ready for the C-Channel, and then the shell!