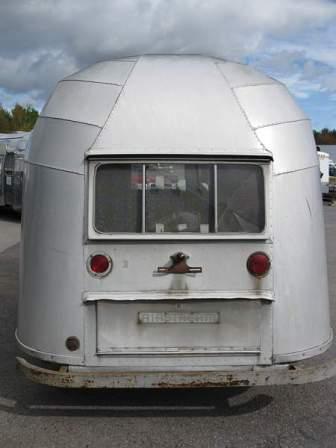
We don't use a lot of water in our 2008 Airstream, we can go without a fresh water fill up for at least 5 days. And I expect that our water use will remain the same for our 1955 vintage Airstream.
We do need a larger water tank than the missing original fresh tank that fit under the cabinet under the front window.
We are taking advantage of Vintage Trailer Supply's standardized water tanks, positioning the two tanks below the floor in between the frame rails. Plumbing the fresh tanks in tandem will work really well for us. The tandem gray tanks will hold the same amount of water, reducing the possibility of overflow which I really want to avoid!
Putting the tanks into their spots in the frame rails.
Close-up of the tank straps covered with a peel-and-stick waterproof membrane.
The street-side plumbing is for the bathroom lavatory sink and the shower drains. They join together to drain into the new grey tanks. Back in 1955 Airstream and other trailers did not have holding tanks for water coming from the sinks and shower, and water was just dumped on the ground. Not very sanitary, and so I'm glad to upgrade our Flying Cloud.
Cutting the cross members for the tandem tank fittings.
The cross members ready for the tank connector. Note: the step was painted with the gray topcoat over the POR15 rustproof paint.
Airstream Restoration of Scott and Kathy's 1955 Flying Cloud Whale Tail - Our California Vintage Airstream.
Showing posts with label Steps. Show all posts
Thursday, January 30, 2014
Tuesday, January 28, 2014
Floor to Frame - Details
Aluminum was used to protect the plywood floor at the spare tire.
Aluminum protecting the floor above the step.
The inside of the wheel well.
Aluminum protecting the floor above the step.
The inside of the wheel well.
Labels:
Aluminum,
Floor,
Improvement,
Spare Tire,
Steps,
Vintage,
Wheel Well
Location:
Peru, NY 12972, USA
Monday, January 27, 2014
Belly Pan Improvements - Vintage and Better!
As I'm not an expert, I really never thought much about the underside of our trailer. I did know that Airstream trailers have aluminum belly pans which cover the frame, and the bottom of the plywood floors. This keeps all the ugly, wet, muddy, floor-rotting frame-rusting, road debris from ruining the trailers from the foundation up. It is one of many reasons why Airstreams survive and are enjoyed for decades!
One of our improvements are in the area of the spare tire. The tire will fit inside the trailer frame, recessed like the newer model Airstreams. Our vintage Airstream will have this area lined in aluminum, keeping the plywood floor dry. To protect the floor under the frame surrounding the spare tire, the frame is wrapped in more aluminum.
Originally the floor area under our steps appears to have be painted. For our restoration, another belly pan improvement is a new aluminum lining to protect the area above the Swing-Away Step. Colin Hyde fabricated this for us - thank you! This will protect the floor from wood rot found when we first saw our 1955 Flying Cloud.
One of our improvements are in the area of the spare tire. The tire will fit inside the trailer frame, recessed like the newer model Airstreams. Our vintage Airstream will have this area lined in aluminum, keeping the plywood floor dry. To protect the floor under the frame surrounding the spare tire, the frame is wrapped in more aluminum.
Originally the floor area under our steps appears to have be painted. For our restoration, another belly pan improvement is a new aluminum lining to protect the area above the Swing-Away Step. Colin Hyde fabricated this for us - thank you! This will protect the floor from wood rot found when we first saw our 1955 Flying Cloud.
Monday, January 7, 2013
Step Attached to the Frame and Painted
Our original step - refurbished - with new Slide-A-Way welded to the frame.
The metal on the outside of the cross members will be used to attach the belly pan.
Painted to prevent rust.
Now I have a way to step into my trailer! I am so looking to using this step!
The metal on the outside of the cross members will be used to attach the belly pan.
Painted to prevent rust.
Now I have a way to step into my trailer! I am so looking to using this step!
Labels:
1955,
Chassis,
Flying Cloud,
Frame,
Painting,
POR15,
Steps,
Vintage Airstream
Location:
Plattsburgh, NY, USA
Monday, December 24, 2012
Stepping Up Quality.
The rebuilt and beefed up cross members for our steps.
The step's Glide-A-Ride mechanism.
Slide in step ready to install.
Step in place. Sturdy. Steady. Safe.
Step in closed position
Quality is all in the details!
I don't know that I can explain in words, how excited I am to see this well loved and yet well worn vintage Airstream trailer be revived and coming back to life. Not ready yet. Baby steps! Moving forward!!
The step's Glide-A-Ride mechanism.
Slide in step ready to install.
Step in place. Sturdy. Steady. Safe.
Step in closed position
Quality is all in the details!
I don't know that I can explain in words, how excited I am to see this well loved and yet well worn vintage Airstream trailer be revived and coming back to life. Not ready yet. Baby steps! Moving forward!!
Labels:
Aluminum Trailers,
Chassis,
Colin Hyde Trailer Restorations,
Frame,
Improvement,
Steps,
Vintage Airstream
Location:
Plattsburgh, NY, USA
Monday, November 12, 2012
Rust off the Glide-A-RIde Steps

I think it is so cool that our vintage airstream Flying Cloud trailer was built with the then new retractable step. 1955 was the first year for Airstream retractable steps - called the Glide-A-Ride.
Labels:
As Found,
Flying Cloud,
Frame,
Rust,
Steps,
Vintage Airstream
Location:
Peru, NY 12972, USA
Monday, November 5, 2012
Old Steps - See the Rust
The front edge of the step is slightly rusty. The back edge is barely holding together. Improvements needed!
Labels:
As Found,
Flying Cloud,
Rust,
Steps,
Vintage Airstream
Thursday, September 23, 2010
Soft and Gooey

Oh yes. The faux-wood-look vinyl covered a bit of floor rot. The entire floor is bouncy and the right side is not secure.
Being under the trailer myself, I am better understanding what I've seen in photos of other trailers. Below is my photo taken from the ground looking up into the area normally covered by the belly pan - the underside of the plywood floor. The step should securely attach to the frame here. The step on the right is photographed from the rear of the trailer and looking forward. The 3" deep (aka tall) C-channel frame shown on the left.

Below: As expected there is floor rot at the typical 1950's segmented C Channel. The first photo shows the C-Channel flat on the floor.

The photo below shows a small strip aluminum - remaining when the rest of the belly pan was cut off and removed. This aluminum belly pan strip was pulled down through the rotted floor to below the chasis frame. On the right side of the photo is the segmented C channel.
Labels:
As Found,
Chassis,
Floor,
Frame,
PO changes,
Rot,
Rust,
Steps,
Water Damage
Subscribe to:
Posts (Atom)
.jpg)
.jpg)
.jpg)
+compressed.jpg)
+compressed.jpg)

+compressed.jpg)
+Floor+Attached+Spare+Tire.jpg)
+Attached+Step+with+Aluminum+to+Protect+Floor.jpg)
+Floor+Attached+Wheel+Well.jpg)
+Spare+Tire+Area+on+Frame+compressed.jpg)
+compressed.jpg)
+compressed.jpg)
+compressed.jpg)
+compressed.jpg)
+compressed.jpg)
+compressed.jpg)
+compressed.jpg)
+compressed.jpg)
+compressed.jpg)
+compressed.jpg)
+compressed.jpg)

