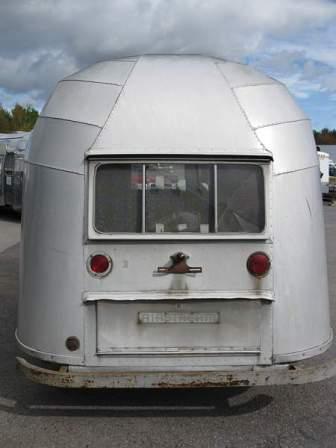
Airstream Restoration of Scott and Kathy's 1955 Flying Cloud Whale Tail - Our California Vintage Airstream.
Showing posts with label Improvement. Show all posts
Thursday, April 2, 2015
Poor Me. POR me.
With the rust gone and the reinforcement securely welded, the original propane tank holder was painted with POR15 to stop any future rust. The four lines of rivets securing the hold-down plate will keep the frame attached to the shell for years to come! I'm so ready to travel in improved 1955 style! We opted to keep the original style hitch crank.
Labels:
A-Frame,
Hold-Down Plate,
Improvement,
POR15,
Propane,
Rivet
Sunday, March 16, 2014
Protecting Jalousie Window
Our only jalousie window is at the front of the 1955 Flying Cloud. Many other trailers have jalousie windows on the sides of their vintage trailers, but the original owners (who are you?) chose to have the window with glass louvers at the dining area.
Great idea but, what about the potential for crashing flying rocks? Even tiny chips of gravel or sand flying at 60 mph could break glass. We enjoy fly fishing, and many of the best "hidden" spots are along winding rivers on narrow gravel roads. To drive to quiet spots and/or boondock, we again will need the smaller less maintained roads which are not paved in concrete and cement or asphalt. So Colin's guys made us a custom built stone guard for our front window. Made of wavy green fiberglass, and yes Colin did say fiberglass! We will have light and save our windows too!
Shown propped open while our stone guard awaits the opening arms and tie down clips.
Looking at the details!
Great idea but, what about the potential for crashing flying rocks? Even tiny chips of gravel or sand flying at 60 mph could break glass. We enjoy fly fishing, and many of the best "hidden" spots are along winding rivers on narrow gravel roads. To drive to quiet spots and/or boondock, we again will need the smaller less maintained roads which are not paved in concrete and cement or asphalt. So Colin's guys made us a custom built stone guard for our front window. Made of wavy green fiberglass, and yes Colin did say fiberglass! We will have light and save our windows too!
Shown propped open while our stone guard awaits the opening arms and tie down clips.
Looking at the details!
Location:
Peru, NY 12972, USA
Saturday, March 15, 2014
First Look - New Bumper Trunk Lid - Keeping Water Out!!!
Just a quick sneak peak at our new bumper trunk. This is not original to our trailer, so Colin's guys fabricated the aluminum lid.
Key to keeping the plywood floor from rotting is to keep it dry. Our 1955 Flying Cloud has the sloping rear end which helps move water away from the trailer. Colin added the aluminum flashing between the exterior shell and the C-Channel. This small but huge addition acts like flashing in other applications, moving rain water away from the entry point.
We will definitely use the extra outdoor storage, and I really appreciate the extra protection at the rear of the trailer.
Key to keeping the plywood floor from rotting is to keep it dry. Our 1955 Flying Cloud has the sloping rear end which helps move water away from the trailer. Colin added the aluminum flashing between the exterior shell and the C-Channel. This small but huge addition acts like flashing in other applications, moving rain water away from the entry point.
We will definitely use the extra outdoor storage, and I really appreciate the extra protection at the rear of the trailer.
Labels:
Aluminum,
Bumper,
Bumper Trunk,
Colin Hyde Trailer Restorations,
Exterior,
Improvement,
Rot,
Water Damage
Location:
Peru, NY 12972, USA
Friday, March 14, 2014
Propane Tanks Support Updated Post
Rather than leave it alone, I've decided to update the March 1st 2014 post. The photo of just this old rusty as found tank support was too short and not helpful. The old 3/1 post photo.
While we purchased new propane tanks from Vintage Trailer Supply, or original propane tank support bracket survives and got some attention.
This is the original rod, and also the crank handle for the trailer jack.
Love seeing photos that Colin sends. And it is a great to see the 55 FC written on all our parts. Colin has organization as well as knowledge and creativity to solve problems. Yeah!
With the rust rod removed and the bent base straightened, then it was cleaned up - sand blasted.
I wonder if Colin is still using the sand blasting cabinet that he bought in "Mary Tyler Moore" Minnesota VAP Episode 26 on a hot humid summer day...
A steel reinforcement was welded to the base of the propane tank mount before the rod was installed.
Labels:
As Found,
Improvement,
Original,
Propane,
Rust
Location:
Peru, NY 12972, USA
Thursday, March 13, 2014
Improvement to Original Shell Structure - Wheel Well Support
Airstreams are built to last. Part of the durability is how the shell is attached with rivets to C-Channels which are bolted to the floor and frame.
Back in 1955, two areas where the interior aluminum walls were not secured to the wall structure are the wheel wells. Colin was careful to improve our trailer during restoration. C-Channels were added to the wheel well - to secure this area of potential weakness.
Sorry for the fuzziness of this second photo.
Back in 1955, two areas where the interior aluminum walls were not secured to the wall structure are the wheel wells. Colin was careful to improve our trailer during restoration. C-Channels were added to the wheel well - to secure this area of potential weakness.
Sorry for the fuzziness of this second photo.
Location:
Peru, NY 12972, USA
Tuesday, March 11, 2014
Windows - We've Got Windows! - Part 5 - Support
Support - another Colin Improvement for our 1955 Flying Cloud.
The vintage Airstream windows were not all well supported in the walls. Colin adds aluminum to stabilize the windows for travel down the road.
Supports were also fabricated for the windows themselves.
I continue to be impressed with how Colin plans ahead to create a quality restoration - Thanks Colin!
I'm testing a new photo posting method - click on the photo for a slightly larger photo. Do you like it?
The vintage Airstream windows were not all well supported in the walls. Colin adds aluminum to stabilize the windows for travel down the road.
Supports were also fabricated for the windows themselves.
I continue to be impressed with how Colin plans ahead to create a quality restoration - Thanks Colin!
I'm testing a new photo posting method - click on the photo for a slightly larger photo. Do you like it?
Labels:
Colin Hyde Trailer Restorations,
Improvement,
Wall,
Window
Location:
Peru, NY 12972, USA
Thursday, March 6, 2014
Air Conditioner - How Will it Fit?
We had Air Conditioner Plans.
The specification sheet measurements don't exactly match the condenser portion of the air conditioner. Fortunately Scott and Colin are both working on possible solutions to fit the trailer.
Colin will be making a cardboard mock-up of the AC unit part, so help us understand the fit. Being 1200 miles from the trailer, we can't just pop over for a bit. So thank you Colin!
Photos with tape measure.
Measured within the condenser box as provided
So if we remove the condenser coils from the metal box, the dimensions are smaller.
Additional room is needed for the condenser's exhaust fan
With the box
Without the box
The third dimension is the same, with or without the box
The specification sheet measurements don't exactly match the condenser portion of the air conditioner. Fortunately Scott and Colin are both working on possible solutions to fit the trailer.
Colin will be making a cardboard mock-up of the AC unit part, so help us understand the fit. Being 1200 miles from the trailer, we can't just pop over for a bit. So thank you Colin!
Photos with tape measure.
Measured within the condenser box as provided
So if we remove the condenser coils from the metal box, the dimensions are smaller.
Additional room is needed for the condenser's exhaust fan
With the box
Without the box
The third dimension is the same, with or without the box
Labels:
Air Conditioner & Vents,
Improvement,
Layout
Tuesday, February 18, 2014
Lower Panels Replaced - Last Ones!
Our 1955 Flying Cloud has a front panel that wraps around the entire front of the Airstream. Riveted to the bottom of the end cap, the lower front panel does not lining up with the bottom of the jalousie window and extends down to the banana wrap. The largish panel does extend from the street-side window to the curb-side windows. After checking RJ Dial's extensive Vintage Airstream website, it appears that the factories had many front panel versions for the 50's Flying Cloud models.
Our new front lower panel is in place and ready for buck rivets.
The small panel just forward of the door was replaced.
Lots of rivets were used to attach the front panel.
Four rows of rivets will attach the shell to the steel attachment-bracket, rather than the two rows Airstream originally used in 1955.
More current models, including our 2008 Airstream no longer are made with any vertical stabilizing steel attachment-bracket commonly called the hold-down plate. Current production by Airstream has the aluminum shell is riveted to the C-Channel only.
Our new front lower panel is in place and ready for buck rivets.
The small panel just forward of the door was replaced.
Lots of rivets were used to attach the front panel.
Four rows of rivets will attach the shell to the steel attachment-bracket, rather than the two rows Airstream originally used in 1955.
More current models, including our 2008 Airstream no longer are made with any vertical stabilizing steel attachment-bracket commonly called the hold-down plate. Current production by Airstream has the aluminum shell is riveted to the C-Channel only.
Labels:
Aluminum,
Exterior,
Frame,
Hold-Down Plate,
Improvement,
Rivet,
Shell
Location:
Peru, NY 12972, USA
Thursday, February 13, 2014
Galvanic Corrosion - Hinge Patch Solution
To work on our door, it was removed from the shell, exposing hidden galvanic corrosion. The aluminum and steel support behind the upper hinge were both badly damaged. Repairs will be done in place as we are not replacing the upper curb side panel, and there is no other reason to remove the aluminum skin.
A patch was cut and laid inside the wall, positioned with cleco fasteners.
Inside the wall, a thick aluminum patch is bent on one side and is securely attached to the supporting aluminum wall stud.
The hinge is positioned onto the new aluminum patch before it is riveted.
A patch was cut and laid inside the wall, positioned with cleco fasteners.
Inside the wall, a thick aluminum patch is bent on one side and is securely attached to the supporting aluminum wall stud.
The hinge is positioned onto the new aluminum patch before it is riveted.
Labels:
Aluminum,
Cleco,
Corrosion,
Door-In-A-Door,
Exterior,
Hinge,
Improvement,
Vintage Airstream
Location:
Peru, NY 12972, USA
Tuesday, February 11, 2014
Air Conditioner - Arrives in New York
Our first photos of the new air conditioner. While I understand the
concept of how an air conditioner works, it does not look like much to
me. I look forward to Colin's installation!
The Air conditioner's condenser will fit under the floor at the rear of the Airstream.
Labels:
Air Conditioner & Vents,
Improvement
Location:
Peru, NY 12972, USA
Wednesday, February 5, 2014
Air Conditioner - Yes We Will
Sweet peaceful sleep. I have a need to sleep. And I can't sleep in our summers' overheated air that drips with humidity. Not like the cool droplets on the outside of a beer bottle - it is more like living in a steam shower. Water in the oppressively hot air condenses on the ceiling and rains down the walls as if all burners were boiling huge pots of pasta. So we are adding an air conditioner to our vintage Airstream.
But.
No, we don't want a clunky roof air conditioner. It would ruin the graceful line of the trailer outside. Even with the new (cool modern) lower profile interior units the interior ceiling would not look "right".
Briefly, we looked at an air conditioner that would slide out of a new street-side drawer. We were worried about someone outside walking into the open drawer. Visually, we did not really want to add another access panel to the shell. And then there are reports that the units freeze up. So we are trying something new!
Our choice is to work with Colin to use a Dometic Auxiliary Self-Contained Truck Air Conditioner. The noisy compressor will be in a compartment below the floor with air intake and exhaust through louvers in the belly pan.
But.
No, we don't want a clunky roof air conditioner. It would ruin the graceful line of the trailer outside. Even with the new (cool modern) lower profile interior units the interior ceiling would not look "right".
Briefly, we looked at an air conditioner that would slide out of a new street-side drawer. We were worried about someone outside walking into the open drawer. Visually, we did not really want to add another access panel to the shell. And then there are reports that the units freeze up. So we are trying something new!
Our choice is to work with Colin to use a Dometic Auxiliary Self-Contained Truck Air Conditioner. The noisy compressor will be in a compartment below the floor with air intake and exhaust through louvers in the belly pan.
Almost Mobile - Axle Mounted
For softer travel and longevity of our vintage Airstream, we changed from the original leaf spring axles to torsion axles.
The center belly pan is prepared and positioned for rivets.
The new torsion axles are mounted.
The axles are bolted onto the mounting plates, and the brakes are wired.
Trailer shocks were installed, attached to the shock mounts in the wheel well. This photo shows the street-side wheel well that was reshaped with an adjusted offset for room for the toilet.
Labels:
Axle,
Belly Pan,
Brakes,
Improvement,
Wheel Well
Location:
Peru, NY 12972, USA
Tuesday, February 4, 2014
Security, Secured, and Structurally Sound - Spare Tire
Back in the day, there was no spare tire holder on the 1955 Airstream trailers.
Some owners carried their tires in their tow vehicles, or drove without the security of having an extra Airstream tire. Some owners added tires to the back of their trailer with or without the option of aluminum wheel covers. Without carefully planned extra reinforcement of the frame, the added spare tire has caused troubles. Sadly, the extra weight at the back of the trailer can cause more movement and bounce in the back of the trailer.
As I understand this: The trailer is like a child's see-saw or teeter totter. The axle and tires is the fulcrum point, while the front and rear of the trailer can move up and down. The front of the trailer has a more limited range of travel as it is attached to the tow vehicle by the hitch. I wrote earlier about front end separation. Movement in rear of the trailer occurs as there is nothing to minimized the bounce. So by adding a spare tire to the rear, the extra weight causes a wider range of movement. The stress of the movement can cause the shell and chassis to separate - the dreaded rear end separation.
Fortunately, our 1955 Flying Cloud was not subjected to this abuse!
Our spare tire will be held at the front of the trailer, consistently adding to the hitch weight. The aluminum covering the front cross member, steel frame and plywood floor is riveted into place.
Some owners carried their tires in their tow vehicles, or drove without the security of having an extra Airstream tire. Some owners added tires to the back of their trailer with or without the option of aluminum wheel covers. Without carefully planned extra reinforcement of the frame, the added spare tire has caused troubles. Sadly, the extra weight at the back of the trailer can cause more movement and bounce in the back of the trailer.
As I understand this: The trailer is like a child's see-saw or teeter totter. The axle and tires is the fulcrum point, while the front and rear of the trailer can move up and down. The front of the trailer has a more limited range of travel as it is attached to the tow vehicle by the hitch. I wrote earlier about front end separation. Movement in rear of the trailer occurs as there is nothing to minimized the bounce. So by adding a spare tire to the rear, the extra weight causes a wider range of movement. The stress of the movement can cause the shell and chassis to separate - the dreaded rear end separation.
Fortunately, our 1955 Flying Cloud was not subjected to this abuse!
Our spare tire will be held at the front of the trailer, consistently adding to the hitch weight. The aluminum covering the front cross member, steel frame and plywood floor is riveted into place.
Labels:
A-Frame,
Aluminum,
Improvement,
Spare Tire,
Vintage Airstream
Monday, February 3, 2014
Belly Pan - Panels to Access Plumbing
Colin worked with us to determine the best way to have an Airstream that looks vintage, and still has the modern conveniences that we will use to make our life comfortable.
The curb side and street side belly pan panels are riveted - using the larger belly pan rivets.
Situated in the belly pan, the combination grey water and black water dump valve will be accessible through an access panel on the street side belly panel. The second access panel will allow maintenance on the grey and black water drain pipes, if needed, without cutting open the belly pan.
Using 5052 Aluminum at 032 thick, another street side panel provides maintenance access to the bathroom lavatory sink and shower drains. While we've never had troubles with our 2008 Airstream's plumbing, we have worked on home plumbing a few times. The panels will make any work much easier. Insulated with Reflextix.
The curb side and street side belly pan panels are riveted - using the larger belly pan rivets.
Situated in the belly pan, the combination grey water and black water dump valve will be accessible through an access panel on the street side belly panel. The second access panel will allow maintenance on the grey and black water drain pipes, if needed, without cutting open the belly pan.
Using 5052 Aluminum at 032 thick, another street side panel provides maintenance access to the bathroom lavatory sink and shower drains. While we've never had troubles with our 2008 Airstream's plumbing, we have worked on home plumbing a few times. The panels will make any work much easier. Insulated with Reflextix.
Labels:
Aluminum,
Belly Pan,
Black Water Tank,
Colin Hyde Trailer Restorations,
Drain,
Gray Water Tanks,
Improvement,
Insulation,
Lavatory,
Plumbing,
Rivet,
Shower,
Vintage Airstream
Location:
Peru, NY 12972, USA
Subscribe to:
Posts (Atom)
.jpeg)
.jpg)
+Custom+Built+Stone+Guard+1.jpeg)
+Custom+Built+Stone+Guard+Open+However+Still+Requires+Arms+and+Tie+Down+Clips+2.jpeg)
+Custom+Built+Stone+Guard+Open+However+Still+Requires+Arms+and+Tie+Down+Clips+1.jpeg)
++Custom+Built+Stone+Guard+Details.jpeg)
+Fabrication+of+bumper+trunk+lid.jpg)

+Original+Propane+Tank+Bent+Base+Straightened+3+and+Rod+with+Original+Crank+Handle.jpeg)
+Original+Propane+Tank+Base+with+Rusty+Rod+Removed+2.jpeg)
+Original+Propane+Tank+Bent+Base+Straightened+1.jpeg)
+Original+Propane+Tank+Bent+Base+Straightened+2+and+Sand+Blasted.jpeg)
+Propane+Tank+Base+Reinforcement+Plate+Being+Welded+to+Bottom.jpeg)
+Propane+Tank+Base+Rod+Reinstalled.jpeg)
+Wall+support+&+C-channels+fab'd+for+around+wheel+wells+-+Originally+the+walls+just+flapped+in+the+breeze.jpg)

+Support+channels+fab'd+for+sides+on+windows.jpg)

+AC+Condenser+Measurements.jpg)

+AC+Condenser+Measurements.jpg)
+Front+Wrap+Panel+Ready+to+Rivet.jpg)
+Curbside+Panel+in+Front+of+the+Door.jpg)
+Bucking+Front+Wraparound+Panel.jpg)
+on+2008+Airstream.jpg)
+Upper+Hinge+Removed+to+Reveal+Galvanic+Corrosion.jpg)
+Hinge+Patch+Ready+to+Rivet.jpg)
+Hinge+Patch+Inside+Wall+Thick+Aluminum+Attached+to+Wall+Stud.jpg)

+New+Split+AC+-+Condenser.jpg)
+New+Split+AC+-+Evaporator.jpg)
+Central+bellypan+fabrication.jpg)
+Central+Bellypan+Riveted+Axle+Installation.jpg)

+Brake+wiring.jpg)
+Brake+wiring.jpg)
+Shocks+Installed++Streetside+Wheel+Well+Adjusted+Offset+to+Fit+Toilet.jpg)
+Front+crossmember+trim+cover.jpg)
+Perimeter+belly+pan+panels+riveted.jpg)
+Service+Panel+for+Dump+Valve+and+Access+to+Dump+Valve+Handle.jpg)
+Shower+Service+Panel+for+Shower+and+Lavatory+Sink+Drain+Trap.jpg)