A new belly pan is being attached to our vintage Airstream frame!
Our shell-off vintage Airstream restoration at this time looks like 2 completely different projects.
The shell was polished and we need to make a decision about which panel or panels to replace.
And our chassis is getting close to being completely done - so exciting!!
Cuts in the aluminum for the corner construction is very familiar to me. It looks like fabric clipped to ease a concave curve.
Because we added a space for a spare tire under the frame, the belly pan is installed in a few more panels. Just so I don't forget - the belly pan aluminum is not the same as used on the sides of Airstreams. The belly pan is made of 505 032 thick.
The cleco fasteners are holding the rear street-side panel in place before it is riveted. Cleco is a newer tool for me, so I googled the word to find out it is also spelled cleko.
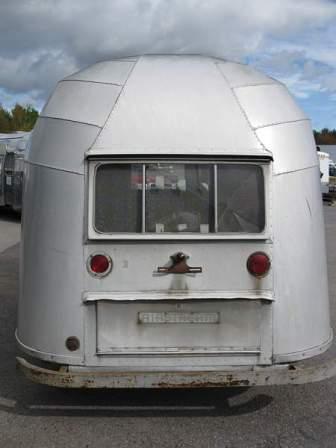
Airstream Restoration of Scott and Kathy's 1955 Flying Cloud Whale Tail - Our California Vintage Airstream.
Sunday, February 2, 2014
Saturday, February 1, 2014
Warming Up - Insulating the Belly Pan
Reflectix reflective insulation is cut to fit under the plywood floor between the frame rails including above the water tanks. It will also be used to insulate under the water tanks.
Note: The step is painted with a UV resistant topcoat over the black POR 15.
The visible portions of the rails will topcoat painted soon.
The portions of the frame that are cut out for the plumbing connections - all will be strong! Each cross member will be strengthened at the bottom with a heavy steel bolt-on bridge. The bolts will allow access to the plumbing if needed at a later date.
The dump valve is installed & valve handles extended through the main rail into an are that will be accessible through a flip down hatch.
Gray tanks installed!
Fiberglass Insulation to really keep us warm!
The end of the cross members have the added anti-chaffing strips.
First piece of the belly pan is cut!!!! We are moving forward again!
Note: The step is painted with a UV resistant topcoat over the black POR 15.
The visible portions of the rails will topcoat painted soon.
The portions of the frame that are cut out for the plumbing connections - all will be strong! Each cross member will be strengthened at the bottom with a heavy steel bolt-on bridge. The bolts will allow access to the plumbing if needed at a later date.
The dump valve is installed & valve handles extended through the main rail into an are that will be accessible through a flip down hatch.
Gray tanks installed!
Fiberglass Insulation to really keep us warm!
First piece of the belly pan is cut!!!! We are moving forward again!
Labels:
1955,
Belly Pan,
Drain,
Dump Valve,
Floor,
Flying Cloud,
Frame,
Fresh Water Tank,
Gray Water Tanks,
Improvement,
Insulation,
Plumbing,
POR15,
Reflectix,
Vintage Airstream
Location:
Peru, NY 12972, USA
Friday, January 31, 2014
Adding Grey Tanks - First in 58 Years! Part 2
At Colin Hyde Trailer Restorations, Reid has been working on our plumbing - thanks Reid!
The bathroom lavatory sink and shower join to drain down to the first (forward) tandem grey tan.
First checking the fit of all parts before they are attached/glued together permanently
Adding gray tanks to our vintage Airstream for the first time in 58 years!
During travel, trailers move and flex. While it is not legal or safe to ride in a moving trailer, someday I'd like to get a video set up to see the movement that happens. The movement can break areas that are too stiff. To be sure that our tandem tanks maintain a secure and dry connection, a flexible link is added between grey the two tanks. Thick rigid foam insulation is added to further protect the link and will keep the tanks from shifting forward and backward within the frame. A similar link will be added to the tandem fresh water tanks.
From the back of the rear grey tank, the used water will exit the trailer through the combination black and gray water valve. Unlike modern trailers, the dump valve will not hang below the belly pan. I just realized I have very few photos showing our dump valve - just not photogenic! Because in 1955 we had no dump valve, our Flying Cloud valve handle will not show on the exterior of the trailer. The valve handle will be accessible through a hatch in the belly pan. This decision will also keep our restoration with the beautiful clean design of 1955.
Both the fresh & grey water tanks with plumbing connections.
The portions of the frame that are cut out for the plumbing connections - all will be strong! Each cross member will be strengthened at the bottom with a heavy steel bolt-on bridge. The bolts will allow access to the plumbing if needed at a later date.
The shower pan's drain trap will fit inside the frame, hidden by the belly pan.
The bathroom lavatory sink and shower join to drain down to the first (forward) tandem grey tan.
First checking the fit of all parts before they are attached/glued together permanently
Adding gray tanks to our vintage Airstream for the first time in 58 years!
During travel, trailers move and flex. While it is not legal or safe to ride in a moving trailer, someday I'd like to get a video set up to see the movement that happens. The movement can break areas that are too stiff. To be sure that our tandem tanks maintain a secure and dry connection, a flexible link is added between grey the two tanks. Thick rigid foam insulation is added to further protect the link and will keep the tanks from shifting forward and backward within the frame. A similar link will be added to the tandem fresh water tanks.
From the back of the rear grey tank, the used water will exit the trailer through the combination black and gray water valve. Unlike modern trailers, the dump valve will not hang below the belly pan. I just realized I have very few photos showing our dump valve - just not photogenic! Because in 1955 we had no dump valve, our Flying Cloud valve handle will not show on the exterior of the trailer. The valve handle will be accessible through a hatch in the belly pan. This decision will also keep our restoration with the beautiful clean design of 1955.
Both the fresh & grey water tanks with plumbing connections.
The portions of the frame that are cut out for the plumbing connections - all will be strong! Each cross member will be strengthened at the bottom with a heavy steel bolt-on bridge. The bolts will allow access to the plumbing if needed at a later date.
The shower pan's drain trap will fit inside the frame, hidden by the belly pan.
Thursday, January 30, 2014
Double Draining - Planning the Bathroom Drains
We don't use a lot of water in our 2008 Airstream, we can go without a fresh water fill up for at least 5 days. And I expect that our water use will remain the same for our 1955 vintage Airstream.
We do need a larger water tank than the missing original fresh tank that fit under the cabinet under the front window.
We are taking advantage of Vintage Trailer Supply's standardized water tanks, positioning the two tanks below the floor in between the frame rails. Plumbing the fresh tanks in tandem will work really well for us. The tandem gray tanks will hold the same amount of water, reducing the possibility of overflow which I really want to avoid!
Putting the tanks into their spots in the frame rails.
Close-up of the tank straps covered with a peel-and-stick waterproof membrane.
The street-side plumbing is for the bathroom lavatory sink and the shower drains. They join together to drain into the new grey tanks. Back in 1955 Airstream and other trailers did not have holding tanks for water coming from the sinks and shower, and water was just dumped on the ground. Not very sanitary, and so I'm glad to upgrade our Flying Cloud.
Cutting the cross members for the tandem tank fittings.
The cross members ready for the tank connector. Note: the step was painted with the gray topcoat over the POR15 rustproof paint.
We do need a larger water tank than the missing original fresh tank that fit under the cabinet under the front window.
We are taking advantage of Vintage Trailer Supply's standardized water tanks, positioning the two tanks below the floor in between the frame rails. Plumbing the fresh tanks in tandem will work really well for us. The tandem gray tanks will hold the same amount of water, reducing the possibility of overflow which I really want to avoid!
Putting the tanks into their spots in the frame rails.
Close-up of the tank straps covered with a peel-and-stick waterproof membrane.
The street-side plumbing is for the bathroom lavatory sink and the shower drains. They join together to drain into the new grey tanks. Back in 1955 Airstream and other trailers did not have holding tanks for water coming from the sinks and shower, and water was just dumped on the ground. Not very sanitary, and so I'm glad to upgrade our Flying Cloud.
Cutting the cross members for the tandem tank fittings.
The cross members ready for the tank connector. Note: the step was painted with the gray topcoat over the POR15 rustproof paint.
Wednesday, January 29, 2014
Position the Plumbing and Narrow the Wheel Well
I need a shower and we also want to keep the living space as open as possible so we need to crowd the bathroom. Before when we checked the fit, there is very little room between the toilet and the wheel wheel.
As new plywood is cut for a floor, the size and shape of the trailer can tweak a little bit. Now our 1955 Flying Cloud final size of the Airstream is defined by the floor attached to the chassis. With the wheel wells attached between the plywood and the frame, the bathroom plumbing needed to be double checked.
Axle and tires on, the chassis is flipped over.
Great news! The shell still fits on the floor/frame!
Next the plumbing parts are laid out in their approximate positions.
The mock-up wall is brought back into our trailer to check the fit.
With the new axle and tire in place, we could check that all would still fit, and as expected the wheel well needed to be slightly adjusted.
As new plywood is cut for a floor, the size and shape of the trailer can tweak a little bit. Now our 1955 Flying Cloud final size of the Airstream is defined by the floor attached to the chassis. With the wheel wells attached between the plywood and the frame, the bathroom plumbing needed to be double checked.
Axle and tires on, the chassis is flipped over.
Great news! The shell still fits on the floor/frame!
Next the plumbing parts are laid out in their approximate positions.
The mock-up wall is brought back into our trailer to check the fit.
With the new axle and tire in place, we could check that all would still fit, and as expected the wheel well needed to be slightly adjusted.
Labels:
Black Water Tank,
Chassis,
Mock-Up,
Plumbing,
Rotisserie,
Shell,
Shower Pan,
Toilet,
Vintage Airstream,
Water Pump,
Wheel Well
Location:
Peru, NY 12972, USA
Marmoleum Mineral 5714 - Help?
It is what it is....
Since we made the color selections in March of 2011 – some
items have been discontinued.
The materials we choose were all based on the floor covering
- Marmoleum Mineral #5714.
Marmoleum Mineral #5714 is no longer made by Forbo Flooring
800-842-7839.
We will need to start again with everything…unless Colin's flooring guys have stock there?
Looking for a small miracle.
Anyone have stock?
Labels:
Fabrics,
Floor,
Interior,
Vintage Airstream
Tuesday, January 28, 2014
Floor to Frame - Details
Aluminum was used to protect the plywood floor at the spare tire.
Aluminum protecting the floor above the step.
The inside of the wheel well.
Aluminum protecting the floor above the step.
The inside of the wheel well.
Labels:
Aluminum,
Floor,
Improvement,
Spare Tire,
Steps,
Vintage,
Wheel Well
Location:
Peru, NY 12972, USA
Subscribe to:
Posts (Atom)

+Belly+Pan+Aluminum+Front+Corners.jpg)

+Prefitting+Reflectix+in+frame+-+Step+painted+over+the+POR15.jpg)
+Dump+valve+installed.jpg)
+Grey+tank+final+installation.jpg)
+Fiberglass+insulation+installation.jpg)
+Insulation+installation.jpg)

+Bathroom+sink+&+shower+drain+to+grey+tanks.jpg)
+Flexible+link+between+grey+tanks+and+foam+insulation+to+keep+the+tanks+from+shifting.jpg)
+Black+and+gray+tank+dump+valve+accessible+through+a+belly+pan+hatch.jpg)
+web.jpg)
+Fresh+&+grey+water+tanks+pre-fitted.jpg)
+Shower+drain+trap+will+fit+inside+the+belly+pan.jpg)
.jpg)
.jpg)
.jpg)
+compressed.jpg)
+compressed.jpg)

+compressed.jpg)
+compressed.jpg)
+compressed.jpg)
+compressed.jpg)
+compressed.jpg)
+compressed.jpg)

+compressed.jpg)
+compressed.jpg)
+compressed.jpg)

+Floor+Attached+Spare+Tire.jpg)
+Attached+Step+with+Aluminum+to+Protect+Floor.jpg)
+Floor+Attached+Wheel+Well.jpg)