Like the old song -
Love and Marriage, Love & Marriage - Goes together like a horse and carriage...
Shell & Chassis, Shell & Chassis - Goes together!!
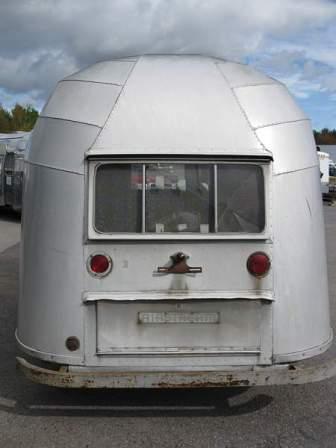
Airstream Restoration of Scott and Kathy's 1955 Flying Cloud Whale Tail - Our California Vintage Airstream.
Showing posts with label Chassis. Show all posts
Friday, February 7, 2014
Thursday, February 6, 2014
Rotisserie. Rotisserie. Rotisserie.
The title is in honor of another great idea by Steve Dancin' Hansen...
This is the last Rotisserie use for our 1955 Flying Cloud, as Colin and his guys turn our belly pan down to the ground.
At the center rear, the belly pan will be fabricated after our air conditioner is installed.
This is the last Rotisserie use for our 1955 Flying Cloud, as Colin and his guys turn our belly pan down to the ground.
At the center rear, the belly pan will be fabricated after our air conditioner is installed.
Location:
Peru, NY 12972, USA
Sunday, February 2, 2014
Belly Pan - All Curved Corners
A new belly pan is being attached to our vintage Airstream frame!
Our shell-off vintage Airstream restoration at this time looks like 2 completely different projects.
The shell was polished and we need to make a decision about which panel or panels to replace.
And our chassis is getting close to being completely done - so exciting!!
Cuts in the aluminum for the corner construction is very familiar to me. It looks like fabric clipped to ease a concave curve.
Because we added a space for a spare tire under the frame, the belly pan is installed in a few more panels. Just so I don't forget - the belly pan aluminum is not the same as used on the sides of Airstreams. The belly pan is made of 505 032 thick.
The cleco fasteners are holding the rear street-side panel in place before it is riveted. Cleco is a newer tool for me, so I googled the word to find out it is also spelled cleko.
Our shell-off vintage Airstream restoration at this time looks like 2 completely different projects.
The shell was polished and we need to make a decision about which panel or panels to replace.
And our chassis is getting close to being completely done - so exciting!!
Cuts in the aluminum for the corner construction is very familiar to me. It looks like fabric clipped to ease a concave curve.
Because we added a space for a spare tire under the frame, the belly pan is installed in a few more panels. Just so I don't forget - the belly pan aluminum is not the same as used on the sides of Airstreams. The belly pan is made of 505 032 thick.
The cleco fasteners are holding the rear street-side panel in place before it is riveted. Cleco is a newer tool for me, so I googled the word to find out it is also spelled cleko.
Wednesday, January 29, 2014
Position the Plumbing and Narrow the Wheel Well
I need a shower and we also want to keep the living space as open as possible so we need to crowd the bathroom. Before when we checked the fit, there is very little room between the toilet and the wheel wheel.
As new plywood is cut for a floor, the size and shape of the trailer can tweak a little bit. Now our 1955 Flying Cloud final size of the Airstream is defined by the floor attached to the chassis. With the wheel wells attached between the plywood and the frame, the bathroom plumbing needed to be double checked.
Axle and tires on, the chassis is flipped over.
Great news! The shell still fits on the floor/frame!
Next the plumbing parts are laid out in their approximate positions.
The mock-up wall is brought back into our trailer to check the fit.
With the new axle and tire in place, we could check that all would still fit, and as expected the wheel well needed to be slightly adjusted.
As new plywood is cut for a floor, the size and shape of the trailer can tweak a little bit. Now our 1955 Flying Cloud final size of the Airstream is defined by the floor attached to the chassis. With the wheel wells attached between the plywood and the frame, the bathroom plumbing needed to be double checked.
Axle and tires on, the chassis is flipped over.
Great news! The shell still fits on the floor/frame!
Next the plumbing parts are laid out in their approximate positions.
The mock-up wall is brought back into our trailer to check the fit.
With the new axle and tire in place, we could check that all would still fit, and as expected the wheel well needed to be slightly adjusted.
Labels:
Black Water Tank,
Chassis,
Mock-Up,
Plumbing,
Rotisserie,
Shell,
Shower Pan,
Toilet,
Vintage Airstream,
Water Pump,
Wheel Well
Location:
Peru, NY 12972, USA
Tuesday, January 28, 2014
Floor Attached to Frame!
Construction!
No longer pulling things apart!
All the preparation work is complete, things are going back together again, and I could not be any happier!!
The old leaf spring axle is gone, white the new smoother riding torsion axle is positioned and the bracket is attached to the frame.
Glue is used to attach the plywood floor is to the frame.
Elevator bolts are used by the Airstream factory to attach the C-Channel to the outriggers only - so they are spaced widely apart, approximately every 2 feet. Then the factory used (uses) self taping screws are used to attach the C-Channel to the plywood between the outriggers.
Our 1955 Flying Cloud has Colin's added strength by using elevator bolts inside the C-channel - all along the C-Channel to more securely attach the frame to the floor and therefore lessen stress to the trailer. The elevator bolts are attached to the outriggers and to the plywood floor. Colin used self-taping screws to further secure the plywood floor to the outriggers and the cross members.
Improved again! Even the curves are attached with elevator bolts - every 8" to 10".
Using the rotisserie, our Airstream is moved to comfortable positions for securely bolting the floor and chassis together. Shown with the hold-down plate welded to the front of the frame. The extra elevator bolts are best seen in the photo from the under-side of the plywood floor.
No longer pulling things apart!
All the preparation work is complete, things are going back together again, and I could not be any happier!!
The old leaf spring axle is gone, white the new smoother riding torsion axle is positioned and the bracket is attached to the frame.
Glue is used to attach the plywood floor is to the frame.
![]() |
Elevator bolts are used by the Airstream factory to attach the C-Channel to the outriggers only - so they are spaced widely apart, approximately every 2 feet. Then the factory used (uses) self taping screws are used to attach the C-Channel to the plywood between the outriggers.
Our 1955 Flying Cloud has Colin's added strength by using elevator bolts inside the C-channel - all along the C-Channel to more securely attach the frame to the floor and therefore lessen stress to the trailer. The elevator bolts are attached to the outriggers and to the plywood floor. Colin used self-taping screws to further secure the plywood floor to the outriggers and the cross members.
Improved again! Even the curves are attached with elevator bolts - every 8" to 10".
Using the rotisserie, our Airstream is moved to comfortable positions for securely bolting the floor and chassis together. Shown with the hold-down plate welded to the front of the frame. The extra elevator bolts are best seen in the photo from the under-side of the plywood floor.
Monday, January 21, 2013
All is Well!
The bottom flange of the wheel well was rusted and needed replacement.
The balance of the wheel well is in good shape. We are fortunate to have a vintage Airstream with metal wheel wells. Changed sometime in the 1970's, some later model trailers have wheel wells instead made with a thermoform plastic. Some of the thermoform plastic wheel wells have over time cracked or degraded.
New galvanized steel was used to form the flange.
Positioned on the trailer for size.
Clamped and attached.
Our new wheel wells are positioned on the frame, ready to be sealed with Vulkem, caulk, and then painted. The hold-down plate is ready for the C-Channel, and then the shell!
Labels:
As Found,
Chassis,
Frame,
Rotisserie,
Rust,
Vintage,
Vintage Airstream,
Wheel Well
Location:
Peru, NY 12972, USA
Monday, January 7, 2013
Step Attached to the Frame and Painted
Our original step - refurbished - with new Slide-A-Way welded to the frame.
The metal on the outside of the cross members will be used to attach the belly pan.
Painted to prevent rust.
Now I have a way to step into my trailer! I am so looking to using this step!
The metal on the outside of the cross members will be used to attach the belly pan.
Painted to prevent rust.
Now I have a way to step into my trailer! I am so looking to using this step!
Labels:
1955,
Chassis,
Flying Cloud,
Frame,
Painting,
POR15,
Steps,
Vintage Airstream
Location:
Plattsburgh, NY, USA
Monday, December 24, 2012
Stepping Up Quality.
The rebuilt and beefed up cross members for our steps.
The step's Glide-A-Ride mechanism.
Slide in step ready to install.
Step in place. Sturdy. Steady. Safe.
Step in closed position
Quality is all in the details!
I don't know that I can explain in words, how excited I am to see this well loved and yet well worn vintage Airstream trailer be revived and coming back to life. Not ready yet. Baby steps! Moving forward!!
The step's Glide-A-Ride mechanism.
Slide in step ready to install.
Step in place. Sturdy. Steady. Safe.
Step in closed position
Quality is all in the details!
I don't know that I can explain in words, how excited I am to see this well loved and yet well worn vintage Airstream trailer be revived and coming back to life. Not ready yet. Baby steps! Moving forward!!
Labels:
Aluminum Trailers,
Chassis,
Colin Hyde Trailer Restorations,
Frame,
Improvement,
Steps,
Vintage Airstream
Location:
Plattsburgh, NY, USA
Monday, November 26, 2012
Painting and Protecting the Frame with POR-15
First the frame was wire brushed. Finally the steel was acid washed to remove any remaining rust. The chassis is being painted with POR-15 to prevent any future rust from happening. Using the rotisserie made this part of the job faster, and is easier on the human body/back. This POR-15, not original to the vintage Airstreams, should keep our 1955 Flying Cloud traveling down the road on Airstream adventures for years to come.
Labels:
Chassis,
Colin Hyde Trailer Restorations,
Frame,
Painting,
POR15,
Rotisserie
Location:
Peru, NY 12972, USA
Monday, October 29, 2012
More A-Frame Improvements
Around the jack there is rust, and structure missing. Improvement needed.
The bottom of the A-Frame is only 3" deep, so that will be strengthened to match the rest of the new deeper 4" frame.
The new metal hold-down plate is now welded to the frame. It will be riveted to the front aluminum skin - strength and stability the old Airstream way! Actually the 1950's trailers often had the hold-down plates bolted to the frames. The welds are much stronger and another Colin Hyde improvement.
New tube Steel to be welded on to reinforce the A-Frame.
New tube welded with a new jack plate.
The bottom of the A-Frame is only 3" deep, so that will be strengthened to match the rest of the new deeper 4" frame.
The new metal hold-down plate is now welded to the frame. It will be riveted to the front aluminum skin - strength and stability the old Airstream way! Actually the 1950's trailers often had the hold-down plates bolted to the frames. The welds are much stronger and another Colin Hyde improvement.
New tube Steel to be welded on to reinforce the A-Frame.
New tube welded with a new jack plate.
Labels:
A-Frame,
As Found,
Chassis,
Flying Cloud,
Frame,
Hold-Down Plate,
Improvement,
Jack,
Rust,
Vintage Airstream
Monday, October 15, 2012
My Little Secret is Out - and It Holds a Lot of Liquid
Our A-Frame did not connect in line with the main frame rails. The angle will help make the frame and the connection the tongue more sturdy. Improvement! We are moving our vintage airstream from deconstruction back into construction! Progress!!!
Newer deeper cross rails, the frame increased from 3" deep to 4" deep.
BUT - and this is a big one for me - From the sides and back of our 1955 Flying Cloud - the trailer will look like a vintage Airstream! It will look to only have a 3" frame! Scott and Colin Hyde have worked together to design a frame that tapers to 4" at the center, while retaining the original look of the shallow frame. So cool!
Subscribe to:
Posts (Atom)
+Lowering+Shell+onto+Chassis.jpg)
+Flipping+Completed+Chassis.jpg)
+Flipping+Completed+Chassis+with+the+Rear+Cavity+Open+for+the+Air+Conditioner.jpg)
+Flipping+Completed+Chassis.jpg)

+Belly+Pan+Aluminum+Front+Corners.jpg)

+compressed.jpg)
+compressed.jpg)
+compressed.jpg)
+compressed.jpg)
+compressed.jpg)

+compressed.jpg)
+compressed.jpg)
+compressed.jpg)
+Axle+Attached.jpg)
+Axle+Attached+Detail.jpg)
+Frame+Glue+for+Floor.jpg)
+Floor+Positioned+with+C-Channel.jpg)
+Rotisserie+Top+of+Floor+1.jpg)

+Attaching+the+Floor+to+the+Frame+1.jpg)
+Attaching+the+Floor+to+the+Frame+3.jpg)
+Attaching+the+Floor+to+the+Frame+2.jpg)
+compressed.jpg)


+compressed.jpg)
+compressed.jpg)
+compressed.jpg)
+compressed.jpg)
+compressed.jpg)
+compressed.jpg)
+compressed.jpg)
+compressed.jpg)
+compressed.jpg)


+compressed.jpg)
+compressed.jpg)
+compressed.jpg)
+compressed.jpg)
+compressed.jpg)
+compressed.jpg)
+compressed.jpg)