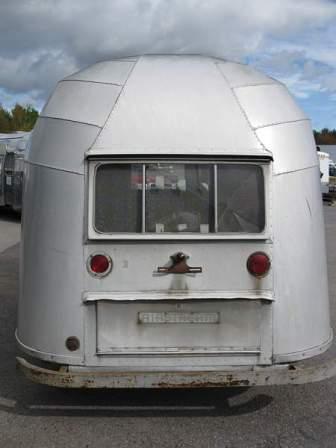
Colin worked with us to determine the best way to have an Airstream that looks vintage, and still has the modern conveniences that we will use to make our life comfortable.
The curb side and street side belly pan panels are riveted - using the larger belly pan rivets.
Situated in the belly pan, the combination grey water and black water dump valve will be accessible through an access panel on the street side belly panel. The second access panel will allow maintenance on the grey and black water drain pipes, if needed, without cutting open the belly pan.
Using 5052 Aluminum at 032 thick, another street side panel provides maintenance access to the bathroom lavatory sink and shower drains. While we've never had troubles with our 2008 Airstream's plumbing, we have worked on home plumbing a few times. The panels will make any work much easier. Insulated with Reflextix.
Airstream Restoration of Scott and Kathy's 1955 Flying Cloud Whale Tail - Our California Vintage Airstream.
Showing posts with label Black Water Tank. Show all posts
Monday, February 3, 2014
Wednesday, January 29, 2014
Position the Plumbing and Narrow the Wheel Well
I need a shower and we also want to keep the living space as open as possible so we need to crowd the bathroom. Before when we checked the fit, there is very little room between the toilet and the wheel wheel.
As new plywood is cut for a floor, the size and shape of the trailer can tweak a little bit. Now our 1955 Flying Cloud final size of the Airstream is defined by the floor attached to the chassis. With the wheel wells attached between the plywood and the frame, the bathroom plumbing needed to be double checked.
Axle and tires on, the chassis is flipped over.
Great news! The shell still fits on the floor/frame!
Next the plumbing parts are laid out in their approximate positions.
The mock-up wall is brought back into our trailer to check the fit.
With the new axle and tire in place, we could check that all would still fit, and as expected the wheel well needed to be slightly adjusted.
As new plywood is cut for a floor, the size and shape of the trailer can tweak a little bit. Now our 1955 Flying Cloud final size of the Airstream is defined by the floor attached to the chassis. With the wheel wells attached between the plywood and the frame, the bathroom plumbing needed to be double checked.
Axle and tires on, the chassis is flipped over.
Great news! The shell still fits on the floor/frame!
Next the plumbing parts are laid out in their approximate positions.
The mock-up wall is brought back into our trailer to check the fit.
With the new axle and tire in place, we could check that all would still fit, and as expected the wheel well needed to be slightly adjusted.
Labels:
Black Water Tank,
Chassis,
Mock-Up,
Plumbing,
Rotisserie,
Shell,
Shower Pan,
Toilet,
Vintage Airstream,
Water Pump,
Wheel Well
Location:
Peru, NY 12972, USA
Thursday, January 21, 2010
We own a new toilet!! Good Bye Gopher Hole!

Some things vintage are worth keeping and restoring. Other things, while historical are not worth keeping. Well, the old toilet had to be replaced - our new toilet arrived and it fits. Good bye gopher hole! Hello black tank! The black tank (to hold toilet contents) will be located under the new toilet. The decision is made - above the floor and under the toilet as shown by the mock-up box right next to the wheel well. Approximately 13 gallons is the plan.
Labels:
Bathroom,
Black Water Tank,
Improvement,
Layout,
Plumbing,
Toilet,
Vintage Airstream,
Wheel Well
Subscribe to:
Posts (Atom)
+Perimeter+belly+pan+panels+riveted.jpg)
+Service+Panel+for+Dump+Valve+and+Access+to+Dump+Valve+Handle.jpg)
+Shower+Service+Panel+for+Shower+and+Lavatory+Sink+Drain+Trap.jpg)

+compressed.jpg)
+compressed.jpg)
+compressed.jpg)
+compressed.jpg)
+compressed.jpg)

+compressed.jpg)
+compressed.jpg)
+compressed.jpg)